Ceiling Repairs You Shouldn’t Ignore

The ceiling plays an important role in both the structural integrity and aesthetics of a space. Periodic inspections are necessary to identify cracks, water stains, and other issues that require repair. Contact Ceiling Repairs Perth for professional help.

Ceiling Repairs

Small holes can often be patched with plaster compound; however, widespread damage may call for a full replacement. Proper priming and painting help achieve a polished restoration look.

Drywall is a popular choice for residential walls and ceilings. It is sturdy, easy to install, and provides a great base for painting and other decorative treatments. But like any construction material, drywall is vulnerable to damage and wear. Cracks, holes, dents, and discoloration are common problems that often need repair. Small blemishes and isolated cracks are easy enough to fix, but larger dings and dents will require more extensive work to properly repair.

Fortunately, there are many ways to repair minor drywall damage. A simple visual inspection is a good way to catch minor issues before they worsen. Proactively addressing these minor problems will minimize future damage and prevent expensive repairs.

When it comes to large dents or holes, you can patch them with spackle or joint compound. Simply clean out the damaged area and apply a light coating of compound to the surface. Smooth the compound with a putty knife and feather the edges to ensure that the repaired surface blends seamlessly with the surrounding wall. Once the compound dries, you can sand and prime it to match the existing wall color.

More extensive cracks are another common problem that needs to be addressed quickly. If you see a crack that is wider than 1/8 inch, or if it appears on a sagging or uneven wall, this indicates a serious structural issue and should be fixed by a professional. Cracks that are caused by humidity, or that appear along with moisture damage, also require professional attention.

A professional can help you select the right drywall materials for your home and can provide installation services. They can also recommend energy efficient insulation and low-VOC paints that will improve indoor air quality. They can even install drywall with mold-resistant additives to protect against dampness and decay.

In addition to repairing drywall, an experienced contractor can help you update your home’s decor with new paint and trim. They can also add crown molding, if needed, to enhance your ceiling’s appearance. They can also upgrade your drywall to green board, which contains additives that prevent the growth of mold and mildew.

Plaster Repair

Plaster walls are often beautiful and add to a home’s historical value, but they can also be fragile. Regular inspections are the key to preventing extensive damage, and catching problems early so they can be repaired. Often, simple repairs are enough to address minor cracks and holes, but extensive damage, large bulges, or signs of structural issues may require professional help.

Inspect your plaster walls for signs of wear and tear, including hairline cracks and holes. While these are common, it is important to note any areas where the plaster seems springy or disconnected from the lath. These spots should be stabilized and may need to be replastered.

To repair plaster cracks, first clear away any loose bits and sand the area smooth with a wallboard knife. Then, apply a thin layer of joint compound to the cracks and feather the coverage out about 3″ around each crack to help it blend with the rest of the wall. After the second coat dries, sand again with a fine-grit sandpaper to create a smooth finish.

Depending on the extent of the damage, you will need to replaster these areas. When you do, make sure to use a non-sag filler designed for ceilings. Also, follow the manufacturer’s instructions to mix the plaster and pour it into a mud pan or bucket. Then, use a plastering trowel to spread the filler in even layers. Make sure to start on the left side of the damaged area and move towards the right to ensure an even finish.

When replastering, it is important to remember that plaster doesn’t harden by air drying and will actually set faster when you physically mix it with a tool. This is because it heats up due to the exothermic reaction that occurs when the plaster mixes with water.

When repairing cracks or holes in plaster walls, be sure to wear a mask and goggles to protect yourself from the dust. After you’re finished sanding, apply a coat of primer designed for plaster to protect your work and make the repaired area ready to paint.

Soffit Repair

Although soffits are not usually a focal point in your home, they are vital for attic ventilation and should be maintained regularly to prevent water damage. Neglecting soffit damage can lead to a number of issues, including moisture buildup and mold growth. This can lead to health and structural problems for occupants. Regular soffit maintenance can help prevent the need for extensive repairs.

The cost of soffit repair depends on the extent of the damage and the materials needed. Labor costs are also a factor, as are other expenses such as scaffolding and equipment rental, disposal of old materials, and permit fees if required. In general, minor repairs such as patching holes or sealing cracks will cost less than extensive repair jobs that involve replacing large sections of the soffit or addressing underlying issues.

Before attempting a soffit repair, be sure to wear proper safety gear and work from a stable ladder or platform. Thoroughly inspect the soffit for damage, especially areas of rot or water damage. If the soffit is infested with mold or mildew, treat it with a mold and mildew remover. If necessary, remove shingle molding from the fascia boards to access the soffit. If the soffit is nailed to the fascia, use a pry bar to remove nails or screws without damaging the surrounding areas of the roof. Once the damaged soffit has been removed, measure the dimensions of the area and cut replacement soffit panels to size using a circular saw or jigsaw. If the soffit is not completely rotten, you can nail the replacement panel in place with galvanized nails or screws.

Once the new soffit is installed, seal the joints with caulk to prevent moisture infiltration. If necessary, paint the replacement soffit to match the color of the existing trim.

To keep the soffit looking its best, you should regularly clean it with a brush or hose and a mild detergent. Be sure to check for moss or mildew growth as well as bee, hornet, or wasp nests. These can create a barrier to attic ventilation and should be removed promptly.

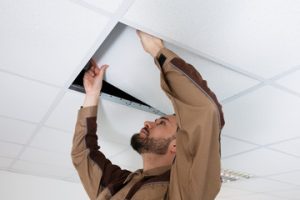
Acoustical Ceiling Repair

Acoustic ceiling tiles help control sound, but they can get damaged and need to be fixed. It’s easy to ignore small blemishes and cracks, but these issues can cause bigger problems and affect how well the tile works. Knowing how to spot water damage and a pro’s help for hidden problems keep these tiles last longer, work better, and look great.

If a ceiling tile is stained or discolored, a simple repair with RENEW can restore it to its original condition. This coating is specially formulated for acoustical ceiling tiles and stucco. Unlike traditional paint, which can compromise the fire safety and acoustical performance by clogging their pores, RENEW maintains these important properties. It is nonflammable when dry and free of chlorinated solvents, making it an environmentally responsible choice.

Staple lifter: The simplest way to remove damaged tiles from the ceiling grid is with an Arrow SL24D staple lifter. This tool can easily remove the acoustical ceiling tile staples without damaging the grid. After the staples are removed, replace the damaged ceiling tile and re-staple it to the framework with the proper amount of pressure. Then use the appropriate drywall screws for your ceiling.

Water damage: If acoustic ceiling tiles are warped, sagging, or discolored, the problem might be water damage. Moisture can rot the tile and damage its insulation. Check for mold, mildew and other signs of moisture on the ceiling. If any are found, a professional must assess the extent of the water damage to determine how serious it is and if the structure of the ceiling needs to be reinforced.

A professionally assessed and repaired acoustic ceiling will last longer, work better and look good. It’s also the best way to prevent health risks from bad air quality, which can result from a ceiling that’s not working correctly. The good news is that acoustic ceilings are usually easy to fix, so it’s worth checking them regularly. Repairing minor blemishes and fixing water damage early on makes your acoustic ceiling last longer, looks better, and helps control sound and temperature.

Cost Factors For Dumpster Rental

Dumpster Rental Maryland is an excellent way to reduce your waste footprint and help the environment. It also helps support local businesses. However, it is important to understand the cost factors involved in this type of service.

Dumpster

To make your dumpster business successful, you need to have a solid marketing strategy. Here are some tips on how to create one.

Choosing the right dumpster size for your project is an important part of the process. Whether you’re cleaning out a garage or doing a major home renovation, it is important that you rent a dumpster that is big enough to hold all the debris you have. Choosing a dumpster that is too small can leave you with wasted space and overflowing waste, while choosing one that is too large can lead to unnecessary expenses.

When it comes to determining the right dumpster size, it is important to consider both the type of debris you have and how much it will weigh. Most dumpsters are rated by their total volume capacity, which is usually listed in cubic yards. This is a more accurate measure than weight, which can vary based on the type of waste you’re throwing away.

The most common dumpster sizes are 10-yard, 20-yard, and 30-yard containers. Each dumpster’s name corresponds to its cubic-yard capacity, making it easy for you to figure out which one is best for your needs. If you’re unsure of which dumpster size you need, it is a good idea to speak with an expert at a local dumpster rental company. They will be able to assess your debris and give you an estimate on the perfect dumpster size for your project.

A 10 yard dumpster is a great choice for smaller projects, such as cleaning out a garage or remodeling a bathroom. This dumpster can fit up to 3 pickup truck loads of waste. A 15-yard dumpster is a good choice for medium projects, such as clearing out a basement or renovating a kitchen. It can also handle larger outdoor projects, such as tree limb removal and general debris cleanup.

A 40-yard dumpster is the largest dumpster available and is suitable for long-term projects such as demolition or building renovations. It can also be used to haul heavy materials such as concrete and drywall. Because these materials have a high density, they will require a heavier-duty dumpster that can be safely transported on the road. When choosing a dumpster, be sure to think about the type of debris you’re throwing away, its weight, and any regulations or restrictions on certain materials.

Permits

Obtaining the necessary permits for dumpster rental is vital to ensure compliance with local regulations and project success. Not only does it help avoid legal complications and delays, but it also demonstrates responsible waste management practices.

The type of permit required depends on where you plan to place the dumpster. Typically, you will need a permit if it is to be placed on or blocking public space such as streets and sidewalks. The best way to determine if you need a permit is to contact your city’s permitting department online or by phone and ask. The staff member will be able to tell you which department is in charge of issuing dumpster permits and can give you directions on how to proceed. Some cities may have more than one department in charge of granting these permits, so be sure to call all three and speak with a representative to determine what the requirements are for your specific situation.

Many dumpster companies handle the permitting process for their customers, so you should check with your provider to see if they offer this service. If they do, the process will likely be streamlined and quicker than going to the city on your own. In some cases, you will need to provide a sketch of the location and describe your project details to ensure that the dumpster is being placed in the correct spot. The permitting process can take anywhere from a few days to several weeks, so make sure to factor this into your timeline.

Depending on your city’s rules, the person in charge of granting the permit may be the owner of the property, the dumpster company, or a homeowner’s association. Some cities require that the tenant submit the permit application, while others require that the rental company or contractor apply on behalf of the owner.

The legal structure of your business will have a significant impact on the amount of taxes you pay and your personal liability, so be sure to choose carefully. LLCs are usually the best choice for small businesses because they offer protection from personal liability and pass-through taxation.

Environmental impact

Dumpster rentals help to minimize the environmental impact of waste disposal by providing a convenient and safe way for individuals to dispose of unwanted items. They also encourage responsible waste management practices by allowing individuals to sort and recycle their materials. This can reduce the amount of garbage that ends up in landfills and saves valuable resources. However, before choosing a dumpster rental service, it is important to consider local regulations and what types of items are permitted in the unit.

The environmental impact of dumpsters is determined by the type and volume of waste that is placed in them, the location where it is picked up and dropped off, and the length of time that it is rented for. The latter can vary from one month to a year or more. It is also important to consider how the rental company calculates its rates. For example, some companies may charge extra fees for e-waste or yard waste. It is also important to research the legal structure of the business before signing a contract. The most common form is a limited liability corporation (LLC), which shields owners from responsibility and offers pass-through taxation.

Many homeowners and contractors use dumpsters to dispose of debris from renovation and construction projects. These dumpsters contain dangerous materials that need to be kept away from people and pets. The dumpsters also provide a safe storage solution for large amounts of contaminated materials until they can be properly disposed of.

Another environmental benefit of dumpster rental is that it prevents waste burning, which releases toxic pollutants into the air. This can have serious effects on human health and the environment. It also contributes to global warming. Renting a dumpster can save energy, money, and resources by eliminating the need for travel to landfills.

In addition, dumpster rentals can make it easier for individuals to comply with local environmental regulations. For example, some communities have strict laws on the placement of trash. Using a dumpster can also reduce the frequency of illegal dumping, which can harm natural habitats and animal populations. Renting a dumpster can also help people avoid costly fines for non-compliance with waste removal and recycling laws.

Insurance

Dumpster rental businesses are exposed to a range of business risks. To minimize these risks, businesses must have the right insurance coverage in place. This includes general liability, commercial auto, workers’ compensation, and professional liability. In addition, businesses should also consider additional coverage for specific waste materials. Having the right insurance coverage ensures that customers are protected from financial loss and keeps the business out of legal trouble.

Operating a dumpster rental business requires compliance with local and national waste management regulations. This includes obtaining necessary permits and licenses, adhering to zoning laws for storage facilities, and ensuring that dumpsters are properly maintained. Furthermore, it is important to set the right expectations with customers and provide them with clear terms and conditions. This will help to prevent disputes and build trust with clients.

When choosing a dumpster rental company, look for one that has a physical location in your area. This will allow them to address any problems quickly and effectively. In addition, they will be able to answer your questions in person. This will save you a lot of time and money, as well as reduce the likelihood of errors and delays.

Liability and insurance requirements for dumpster rental companies include general liability, workers’ compensation, commercial auto, and professional liability. General liability coverage protects against claims related to third-party bodily injury and property damage. If employees are injured during the course of work, workers’ compensation coverage will pay for medical expenses and lost wages. In addition, contractors’ error and omissions insurance is crucial for dumpster rental companies.

To maximize revenue, dumpster rental companies should focus on attracting new customers and maintaining customer satisfaction. This can be achieved through targeted marketing, offering discounts during slow periods, and using a dynamic pricing model. Furthermore, they should make use of social media to promote their services and attract potential customers.

The best way to manage risk is through regular financial analysis. This will help identify opportunities for cost control and growth. Then, the business can determine the right financing options for its needs. This could be through traditional bank loans, equipment financing or leasing, small business grants, or personal savings.

Steps to Prepare Your Pavement for Sealcoating

Sealcoating is most effective when the surface to be covered is clean, dry, and free of all debris. Sprinklers should be turned off for a full day before seal coating, and the area to be worked on should be blocked off with cones or barricades.

Sealcoating

Asphalt is comprised of rock and gravel along with a binder. The binder is degraded by rain, UV rays, chemicals, and traffic. Sealcoating protects the binder and prolongs the life of asphalt-paved surfaces. Visit https://www.rochesternysealcoating.com/ to learn more.

Asphalt sealcoating is among the most crucial pavement maintenance tasks. It protects parking lots from environmental damage and prolongs their lifespan, saving businesses money in repairs and allowing them to make a great first impression on customers. However, if your business is to benefit from sealcoating, adequate preparation is essential for the process. Follow these five steps to ensure that your pavement is ready for a smooth coat of coal tar or asphalt emulsion.

A professional paving contractor will visually inspect the surface of your pavement before starting the sealcoating process. This allows them to spot cracks, potholes, and stains that need immediate attention. The assessment also helps determine whether the asphalt has had enough time to settle and cure, as well as the overall condition of your pavement.

It’s important that the parking lot or driveway be completely clear of debris prior to sealcoating. This includes leaves, dirt, loose pebbles, garbage, toys, cars, and other equipment. It’s also important that any vehicle fluids like oil, gasoline, and hydraulic fluid be washed away. These petroleum-based chemicals interfere with the bond of the new sealant, potentially lowering its quality. 3. Block off the area with barricades or cones to keep pedestrians and vehicles out of the way while the work is being done. This is also a good time to shut off sprinklers.

A proper sealcoat requires a few days of warm, dry weather after application to set properly. Rainy or extremely cold weather could damage the new coating before it has a chance to dry. If the weather looks iffy, reconsider the sealcoating and wait until conditions are better.

Aside from the weather, it’s important that all equipment, materials, and workers are in a safe location during the process. Your professional paving contractor will have barricades and safety tape to mark off the area that’s being worked on to keep everyone out of harm’s way while the sealcoat sets up. Having the right tools and knowing how to use them is important for an efficient sealcoating job.

Mixing

Sealcoating is a mixture of coal tar, asphalt emulsions, fillers and sand applied to the surface of an asphalt pavement to protect it. It is a cost-effective way to maintain your asphalt investment and extend its life by protecting it from damage caused by water, sun, chemicals and other materials used on the roadway. In addition, it can reduce the friction on your paved surface and make it safer for vehicle traffic.

Sealcoat is typically performed from spring through fall when weather conditions are ideal for the process. The surface must be dry and free of all debris, dirt, oil and other contaminants that could cause the sealer to fail before the application process begins. The temperature must be above 50 degrees and rising, and there should be no more than a 40% chance of rain during the application process.

Before starting, it’s important to prepare the area by removing all vehicles from the pavement and blocking off the entrances with cones or barricades. You will also want to protect borders, retaining walls and your garage door from getting any over spray during the process. Once the surface is prepared it’s time to start the mixing of your sealcoat.

Most asphalt sealers come in a container of concentrate that has to be mixed with water, sand and additives. The proportions of each can vary widely from manufacturer to manufacturer, and the sand must meet specific purity, gradation and chemical requirements.

To get the most out of your sealcoat, it is essential that you thoroughly mix all materials. If you don’t mix your material well, it is likely that the solids will settle at the bottom of the container and can get caught in the sealer gun’s spray tip, resulting in an uneven finish.

It is also important to note that the amount of sand/aggregate in your sealcoat mix can have an impact on performance. Increasing the amount of sand/aggregate will result in a tougher film with increased tensile strength, but this may also reduce the adhesive properties. It is recommended that the sand/aggregate not exceed 5-6 pounds per gallon of undiluted sealer.

Application

Asphalt pavement is made up of aggregate such as rock and stone and gravel, held together with a binder which comes from the distillation of certain crude oils. Over time, rain, sun and chemical penetration degrade the binder resulting in oxidation of the aggregate and a brittle surface. Seal coating preserves the binder, slows oxidation and protects the surface from water penetration, sunlight and other environmental factors.

The first step in any professional sealcoating job is to assess the asphalt surface. This involves searching for cracks, potholes, oil stains and other signs of deterioration that should be repaired immediately. The area is then cleaned thoroughly, to remove any dirt or debris that would compromise the quality of the final product. Once the repair work is complete, the blacktop must be completely dry before the sealcoat can be applied. Sprinklers should be turned off prior to application and vehicles should be removed from the site for at least 24 hours.

Next, the area is prepped for application by raking it level and blowing away any loose particles. This allows the finished product to adhere more securely to the pavement, ensuring a longer life expectancy.

Once the area is ready, the contractor will choose between a squeegee or spray application. The spray method is quicker, and crews can cover larger areas in a fraction of the time it takes to use a squeegee. However, this method can leave a slightly thinner application and it is more likely that the spray will miss spots that would have been covered with the squeegee.

With the squeegee method, the contractors will fill buckets with the sealer and apply it directly to the paved surface. They will then use the squeegee to pack the material into the crevices and joints. The most effective way to do this is by using a ride-on sealcoating rig that has a squeegee attachment, or they can manually squeegee the asphalt. Both methods have their pros and cons, and employing both is a great option for achieving the best results. In addition to providing a stronger bond, the squeegee method allows the contractors to reach into corners and other hard to reach places where the spray might have missed.

Drying

Sealcoating can be messy, so it is important to take the time to ensure that the job is done right. This includes removing any excess material and cleaning up the area after the application is complete. Also, it is important to make sure that the area is dry before allowing traffic to begin using the surface again. This is because driving on a wet sealcoating can ruin the appearance and cause damage to the new coating.

When a pavement is properly maintained with regular sealcoating, it protects it from oil and fuel spills as well as chemical substances that will degrade the asphalt. The coating also helps to prevent cracking of the asphalt under vehicular pressure. In addition, it saves money in the long run by preventing the need for full replacement of the pavement.

Most sealcoatings are water-based and contain a significant proportion of water. After applying, this water leaves the sealer film as it dries and cures. The proper curing process allows the water to leave in a controlled manner, allowing the coating to reach its full strength. The climate and pavement surface conditions influence the rate at which this moisture leaves the coating.

This is important because a coating that dries too slowly or in cold weather conditions may not achieve a full cure. This will result in the formation of a gray color or film on the surface which reduces its performance. This problem can be eliminated through the use of special additives that accelerate the drying and curing process.

The type of additive used is important too. For example, rubberizing additives improve flexibility, durability and toughness while fast drying additives allow the sealer to dry quickly. Thickening additives help to build the viscosity of seal coats that have been diluted with large amounts of water. Follow the manufacturer’s recommendations when using these additives to achieve maximum performance from the product. It is also a good idea to avoid mixing different additives, as this could cause the viscosity to go haywire. If this happens, the warranty on the product may be voided.